How to fix an electric plug?
It is difficult for a modern person to do without electrical appliances. A computer, a fridge, a washing machine, a coffee maker, and an iron cannot be listed in total. Some devices run on batteries, but most still plug into the network. So - they have a cord and a plug that plugs into the outlet. For the devices to serve for a long time, the system for connecting to the mains must be in order. But it is not always possible to contact the workshop if the pin is melted or the screw is unscrewed. How to fix an electric plug? We will talk about this in our article.
to contents ↑Can I make out?
Before you fix the plug for the outlet, you need to understand whether it is disassembled or not.
Important! Of course, the non-separable repair will not work, it must be replaced immediately, sometimes together with the cord.
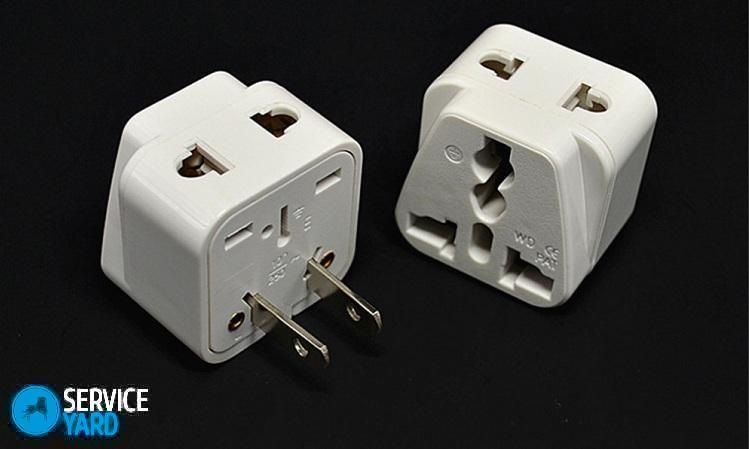
Collapsible forks come in several forms. Unfortunately, there is no single world standard for such devices, and this causes a lot of problems. For example, you bought a device abroad, you are trying to turn it on, and the pins are not included, because the distance between them is greater or less than the one at which the holes at the outlet are. Or there is an additional rod of an incomprehensible shape, which is nowhere to stick.
You can use the adapter, but most often in such cases, the plug is removed:
- unscrews;
- cropped.
To fix the electric plug in this situation, a new one is put in place of the old one, suitable specifically for your outlet. Such an operation usually does not affect the operation of the device.
to contents ↑What are non-separable forks?
Now all devices are available with fixed forks. However, many users still have collapsible ones - on older devices, which, despite their age, work fine.
Depending on where the unit is made, you can read on the marking:
- C5;
- C6:
- CEE 7/16;
- CEE 7/17.
Important! Despite the fact that there are four standard types of marking, there are only two types of forks. In Russia, they comply with GOST 7396.1-89. The first two are Russian, the third and fourth are European. In this case, the C5 plug corresponds to CEE 7/16, and C6 to CEE 7/17.
What else is on the label?
On the plug housing you can find other data:
- maximum permissible current;
- maximum allowable voltage.
The first value means that the appliance will operate on a network where the current is less than or equal to the specified value. The same applies to voltage - if it is greater, the device may burn out.
Important! Each house, designed in accordance with modern design trends and practical preferences of residents, certainly has a large arsenal of various household appliances. To make their use safe both for appliances and for people, we also recommend reading about different types of outlets:
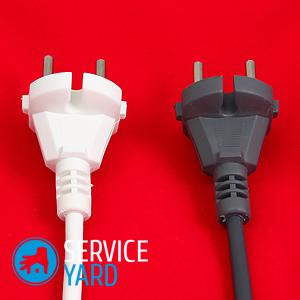
C5 and CEE 7/16
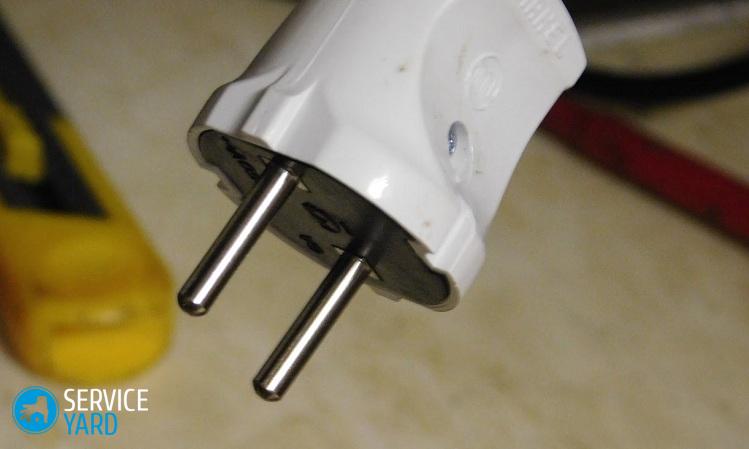
These are forks with round pins. The diameter of the rods is 0.4 cm. The distance between the pins at the ends is slightly larger than near the bases. The rods are insulated 1 cm from the body. These plugs do not have a ground connection. The rated current is 6 A, the power of the device is 1200-1300 watts.
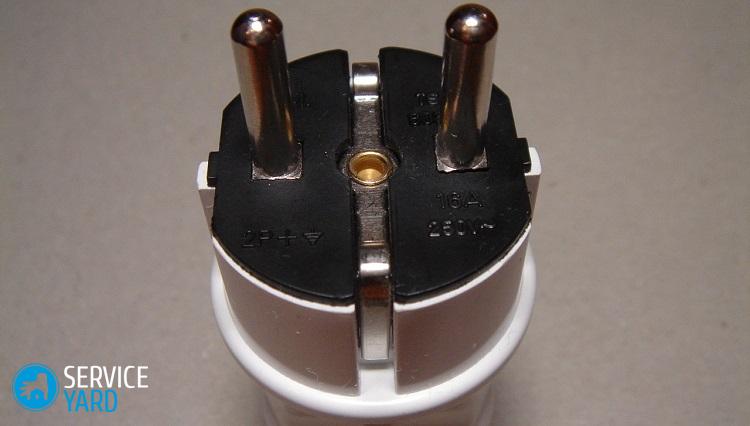
C6 and CEE 7/17
The pins of these forks are also round, but their diameter is larger - 0.48 cm.Some models have a ground contact, while others do not. This device withstands a current of 10 A and is designed for a power of 2200 watts.
Important! Collapsible plugs withstand current up to 6 A and power 1300 W. They can be both with grounding, and without.
How is a fixed fork arranged?
If the question arose, how to make a plug for an outlet, try to understand for a start: what exactly can be repaired? All non-separable forks are similar:
- they have pins;
- pins are installed in the bar;
- the distance between the rods - 1.9 cm;
- conductors are pressed into the rods;
- on the bar there are 2 ledges for the circuit, which is done so that the cord does not break;
- the rods together with the wire are filled with molten plastic.
Important! The non-separable fork has its advantages:
- tightness;
- strong fixing of pins.
Moisture does not get inside, so such a plug is much less likely to burn out or electric shock. The pins do not fall out, and this also increases safety. There is only one drawback of such a device - if it burns out, there is nothing to disassemble, you have to change it entirely.
Important! If you also plan to install several additional outlets for specific devices, use the following instructions:
How is a collapsible fork arranged?
A collapsible plug is very useful if you need to replace a collapsible plug, but you do not want to change the cord or even throw away the appliance. You can still buy one at the electrical goods store. In addition, it can be removed from an old table lamp or a broken ancient refrigerator.
The device of a collapsible plug without grounding is quite simple. She has:
- 2 halves of the case;
- 2 rods (usually brass);
- pressure bar;
- fasteners.
The grounding plug has some differences:
- Pins have pads.
- The contact pads are threaded, they are needed to screw the wires.
- In the case there is a grounding contact - a brass strip.
- There is a thread on the ground contact to wind the conductor.
- The clamping plate is made with a plastic gasket.
Talk about malfunctions
As a rule, molded forks serve as much as the devices themselves, unless you maliciously violate the rules of operation and safety. Such plugs must be changed in the following cases:
- If the factory badly pressed the conductor in the pin.
- If the cord is frayed in the place where it is connected to the case.
We are looking for a place of damage
Quite often, failure can be detected with a simple inspection. There are only two signs:
- The cord bends sharply.
- The shell swelled.
Important! If you can’t immediately find the defect, you will have to pick up a tester. True, in order to ring the wires, you need to get to their opposite ends. For some devices, this is possible, but not for all.
If you cannot disconnect the wire, you need the most ordinary metal sewing needle, not particularly thick:
- Gently twitch the wire and plug in opposite directions - this is necessary to prevent accidental contact of the ends of the dangling conductor.
- Pierce the insulation with the needle where one of the conductors passes.
- Ring the chain “needle - fork shaft”.
- If there is no defect in the first conductor, ring the second.
Phase Indicator Check
For this, you also need a needle. Check very carefully - in no case touch the needle with an unprotected hand:
- Pierce the insulation.
- Insert the plug into the socket - there should be a phase on the wire that you are checking. Touch the needle with a phase indicator.
- If the indicator does not light, there is an open.
- Check the second conductor.
- Pull out the plug.
- Pull out the needle.
Important! The holes after you pull out the needle will tighten quickly.
If the wire is ok
It may happen that you do not find a wire break.This means that you need to look for a malfunction somewhere else. Where?
Quite often, the plug does not work if there is poor contact in the outlet. For example, it almost does not touch the contacts. In this case, the process goes like this:
- A lot of heat is released.
- The pin is overheating.
- The body is melted or carbonized.
- The pin begins to swing.
To determine how good the pin’s contact with the outlet is, you don’t have to disassemble anything. After the appliance works and you unplug it, simply touch the rods. They should be warm, but not hot. If the temperature is too high, take care of the outlet - it must be repaired urgently.
to contents ↑What happened to the collapsible fork?
How to inspect the device, and most importantly - how to assemble the plug of the socket so that there are no extra parts? Well, firstly, understand what kind of malfunctions are. They are the same as cast forks.
But there is also its own specific defect - poor contact of the cord with the rods or its complete absence. The wires are loose when there is no spring washer. As a result, a gap is obtained, contact weakens, and heat, on the contrary, begins to be released more intensively. This is especially true for older appliances.
Important! Bad contact can cause the body to melt or even char.
There is only one repair method - to change the plug.
If the case is intact, the device can be repaired. You will need:
- screwdriver;
- fasteners to replace oxidized;
- sandpaper;
- sharp knife:
- paper;
- camera.

It is very important for a novice electrician not to lose details and remember what was unscrewed at what moment. For this, we need a camera and a sheet of paper (preferably white). It is useful to photograph each operation, and that which was pulled out of a plug or other device can be laid out on a white sheet. Details, however, in this case will be very few:
- Loosen the screw.
- Divide the body into 2 parts.
- Strip the wire where it connects to the pin, sandpaper.
- If the wire is burned, cut the damaged piece, strip the ends and connect to the pins.
- Change the screws and washers if they have scale.
- Connect the halves of the housing.
- Tighten the screw and tighten it.
How to change the plug?
First you need to understand which plug you need. It depends on a number of circumstances:
- device power;
- the need for grounding;
- current strength in the electric network.
Usually the best option is to buy the same part as it was. Of course, if the device is not brought from somewhere in very distant countries, where manufacturers do not consider it necessary to adhere to the usual rules.
Farther:
- Prepare the cord - cut it at a distance of 3-5 cm from the plug.
- Strip the insulation to a length of 2 cm.
- Form rings at the ends of the conductors.
- Insert the screws on which the rovers and flat washers are already installed into the rings.
- Screw the screws into both pins as far as they will go.
- Place the pins in the housing, in the special recesses.
- Lay the bar on the wire.
- Press the bar against the housing with two screws.
- Put on a rubber tube at the place where the wire exits the plug (PVC also fits).
- Connect the halves of the housing.
- Tighten them with a screw and nut.
to contents ↑Important! The halves should fit tightly to each other, the gap, if any, must be eliminated by moving the wires inside the plug.
Three cores
Some electrical appliances must be grounded. The wire they have three cores. The one for grounding is usually colored green. The repair itself is done in exactly the same way - it is necessary to cut off the insulation, form rings, insert the pins and fasten with screws and washers.
Important! If the outlet has grounding, but the wire does not, then the grounding contact remains free.
How to build up a wire?
Sometimes this has to be done, especially if there is no collapsible plug at hand, but there is a broken electrical appliance, from which you can cut the desired part along with a piece of wire. By the way, this will allow you to slightly extend the cord of the device that you are repairing.
Operating procedure:
- Cut the cord with the plug from a broken device - best to the maximum possible length. If building is not expected, it is enough to leave a piece of 15 cm.
- Cut the sheath of the cords 10 cm long without damaging the insulation.
- Pull out the wires without cutting off the sheath.
- You will most likely see three wires - red (brown), blue (cyan) and green: phase, zero and ground.
- Adjust the length of the conductors - the places of the twists should be 2-2.5 cm apart.
- Remove insulation from each core by 1.5 cm. Moreover, if one wire has a green core and the other does not, the insulation cannot be removed from it.
- Connect the single-colored veins with twists - three turns are enough.
- Solder the wires.
- Strip adhesions by removing protrusions and sharp edges.
- Insert the wires into the sheath.
- For reliability, the wire can be insulated, but this is not necessary if the twists do not touch.
to contents ↑Important! You can not solder the twists, but put thin copper or brass tubes on them.
Stock footage
In this article, we examined all the possible damage to the plug and cord of various devices, as well as ways to repair these parts. Remember that to begin to repair electrical equipment, even such simple elements, should only be if you understand the principle of their work and know the safety precautions.
 (No ratings yet)